MantiukHDR Sourceforge Page -- Current Version: 0.3.8
WARNING: You probably came here looking for a program that'll help you create HDR images. I created this script (just uses pfstmo) back when I was still trying to figure out how I wanted to do it. Here's some pointers:
- Don't use this script. Use Luminance HDR, which allows you to better customize the tone-mapped image. Although, you can use this script and this other script for reference on how to do it from the command line.
- Don't directly use the tone-mapped image. Go into GIMP and combine the tone-mapped image, an enfused image, the original image, etc. into something that looks good. For example, you can watch a tutorial I posted on Youtube.
- For ideas on how somebody more pro than I does it, look at this page or one of his video tutorials.
Now that you've been warned about this out-of-date, not-necessarily-useful script, this is the old page:
Description
Okay, so, you may be wondering what this "MantiukHDR" thing is. MantiukHDR is a script that is predominately for use on Linux (although Mac possibly works and with Cygwin you probably could get it to work on Windows) that will help you create lovely HDR images from single or multiple shots. I created this script because I don't want to have to remember a bunch of commands to type in order to get my HDR image. I want to just type in something short and view fantastic images. This program is supposedly going to do that for me. It isn't perfect, but it has helped me create some pretty nice images (in my opinion).
This is not a program. It is a bash script. It uses a few other programs in the script including: pfstmo_mantiuk06 and pfstmo_fattal02 (provided by pfstmo), convert (ImageMagick), enfuse (by enblend-enfuse), and align_image_stack (by Hugin). Without these programs, my script wouldn't do a whole lot (to be exact, it would just print a bunch of errors since it couldn't find any of the programs).
To get this script on arch, it is quite easy. First add one of these repositories to the bottom of your /etc/pacman.conf file. If you have i686 add:
[archlinuxfr]
Server = http://repo.archlinux.fr/i686
If you have x86_64, then add:
[archlinuxfr]
Server = http://repo.archlinux.fr/x86_64
Then, just execute these commands which will install Yaourt (helps install the package from the AUR) and will then install MantiukHDR.
sudo pacman -Sy yaourt; yaourt -S mantiukhdr
* Ubuntu Linux:
For your convenience, I have created a package for Ubuntu users. To use this script on Ubuntu, just click here to download the file and install it (just run the file). Note: This was created on Ubuntu running 64-bit. Thus I can't guarentee that it won't complain about having the wrong architecture, but it shouldn't (in theory) since I specified the architecture as "any."
* Other operating systems:
If you are using another distro of Linux (or possibly Mac... I haven't tried it on Mac though), you can still use the script, but you'll have to manually install all the dependencies listed in the description above. Then you'll have to download the script from the Sourceforge link at the top of the page and manually put it in /usr/bin.
Use It
Now that you have it installed, you need to know how to use it. The script is really easy to use. The most simple usage is just converting a single image into an HDR image. This will convert input.jpg to output.jpg. (Note: I only have ever used JPG and RAW files with this program. You can possibly use other formats, but I can't guarantee that it will work.)
mantiukhdr input.jpg -o output.jpg
You can also use multiple images. This will not output more than one HDR image. This is for use with bracketed shots where they are all taken in the exact same location (or close... it does align them some). This will join the images multiple01.jpg, multiplecow123.jpg, etc. into one image, convert it to an HDR image, and then output output.jpg
mantiukhdr -o output.jpg multiple*.jpg
For testing, you might want to shrink the images to make it faster. You can specify the "-s" option to shrink them. You don't have to specify both a width and height; you could specify "1024x768" or just "1024." This will take input.jpg and resize it to 1024x768 pixels and convert it to an HDR image.
mantiukhdr -o output.jpg -s 1024x768 input.jpg
I have noticed that sometimes the final image isn't always the best one. Thus I use this command which leaves the temporary directory there (/tmp/HDRI*... this is "debug" mode) where I then browse through to find the image that looks the best.
mantiuk -o output.jpg *.JPG -d
Options:
There is more functionality in this script than I use... Here is the help file from executing mantiukhdr --help on my computer:
	MantiukHDR (v0.3.8) - Create HDR Images
	---------------------------------------------------------------------------
	Usage: mantiukhdr -o output.jpg [options] file1 file2 ...
	Options:
	 --debug | -d		keep the temporary files
	 --mantiuk | -m		the alpha of the mantiuk image (default 50)
	 --only | -n 		output only a specific image (enfused, mantiuk, fattal)
	 --output | -o		the output file (required)
	 --overwrite | -y	overwrite the output file if it exists
	 --points | -p		how many points to find (default 8, only used with multiple images)
	 --size | -s		resize the image...such as 800x600
	 --tmp | -t		temporary directory (-d implied)

	Examples:
		mantiukhdr -o output.jpg *.JPG
		mantiukhdr -o output.jpg -s 800 input.jpg
Results
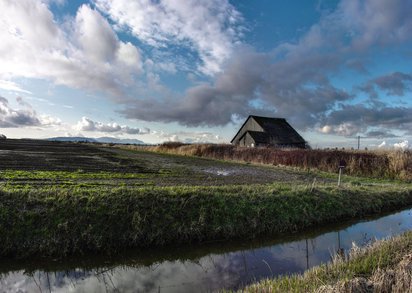
The main reason I created this script was for me to use. Thus I have used it a lot. That is the only reason I keep on updating this thing. Below are some images I have created using this script. I have edited them all in GIMP and on several of them applied a denoise thingy called GREYCstoration (gimp plugin). All of these can be created using version 0.3.4 (although they probably can with 0.3.8 also).


